

Replacing an ink cartridge in your HP printer is an essential maintenance task to ensure consistent print quality and uninterrupted performance. Whether your printer is showing a “Low Ink” warning, producing faded prints, or not printing at all, installing a new cartridge can quickly resolve the issue.
Why Replacing HP Ink Cartridges on Time Is Important
Regular cartridge replacement helps:
- Maintain sharp and vibrant print quality
- Prevent printhead damage caused by dried ink
- Avoid printer errors or interruptions
- Ensure smooth printer performance
HP printers are designed for easy cartridge replacement, making the process simple even for beginners.
Things to Prepare Before Replacing the Cartridge
Before you begin:
- Purchase the correct HP ink cartridge compatible with your printer model
- Turn on the printer
- Keep clean tissue or paper nearby
- Avoid touching the copper contacts or ink nozzles
Using genuine HP cartridges ensures better compatibility and print performance.
Step-by-Step Guide to Replace HP Printer Ink Cartridge
Step 1: Turn On the HP Printer
Make sure your printer is powered on. The cartridge carriage will not move if the printer is off.
Step 2: Open the Printer Access Door
Lift the front or top cover of the printer. Wait until the cartridge carriage moves to the center and becomes idle.

4
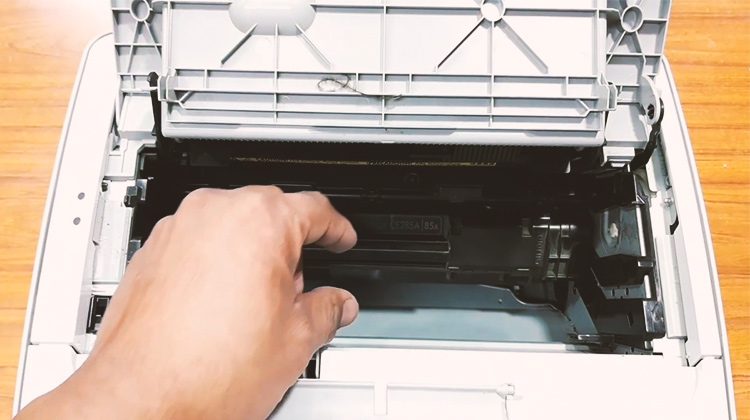
Step 3: Remove the Old Ink Cartridge
- Gently press down on the old cartridge
- Pull it out carefully from its slot
- Dispose of it properly or recycle if applicable
Avoid forcing the cartridge out.
Step 4: Unpack the New Cartridge
- Remove the new cartridge from its packaging
- Peel off the protective plastic tape
- Do not touch the copper-colored contacts
Step 5: Insert the New Cartridge
- Slide the new cartridge into the correct slot
- Push it firmly until it clicks into place
- Ensure color cartridges go into the correct color-coded slot
Step 6: Close the Printer Cover
Close the access door gently. The printer may take a few moments to recognize the new cartridge.
HP Printer Cartridge Alignment After Replacement
After installing a new cartridge, most HP printers automatically prompt for alignment.
- Follow the on-screen instructions
- Print the alignment page
- Scan the alignment sheet if required
Proper alignment ensures accurate text and image printing.
How to Check Ink Levels After Installation
You can verify ink levels by:
- Checking the printer display panel
- Opening HP printer software on your computer
- Viewing ink status in printer settings
If ink levels are not detected, remove and reinstall the cartridge properly.
HP Printer Not Working After Cartridge Replacement?
If your printer shows errors after replacing the cartridge, try these troubleshooting steps:
- Restart the printer
- Remove and reinstall the cartridge
- Clean cartridge contacts gently with a lint-free cloth
- Run printhead cleaning from printer settings
- Update printer drivers
These steps usually resolve common post-installation issues.
How to Download and Install HP Printer Software
Proper software installation ensures smooth cartridge detection and printer performance.
Step 1: Download HP Printer Software
Visit HP’s official support page and search for your printer model.
Step 2: Install the Software
- Run the downloaded setup file
- Follow on-screen instructions
- Connect the printer via USB or Wi-Fi
Step 3: Complete Setup
After installation, restart your system and print a test page.
Updated drivers improve compatibility and reduce printing errors.
HP Printer Login and Account Setup
Creating an HP account helps manage printer services and updates.
How to Sign Up
- Open HP Smart app or HP website
- Click on Sign Up
- Enter your email and create a password
- Verify your account
How to Login
- Open HP Smart
- Enter your registered email and password
- Access printer settings, ink levels, and support tools
Having an account simplifies firmware updates and printer monitoring.
How to Activate HP Printer Services
If your printer supports services like instant ink or cloud printing:
- Log in to your HP account
- Add your printer using its serial number
- Follow activation instructions
- Confirm subscription or service plan
Activation allows remote printing and automatic ink management.
HP Printer Customer Support and Service Options
If replacing the cartridge does not fix your issue:
- Contact HP customer support
- Use HP virtual assistant tools
- Schedule printer servicing if required
- Check warranty status
HP support can guide you through advanced troubleshooting steps.
Common HP Printer Troubleshooting Tips
Here are some additional tips to keep your printer running smoothly:
- Always use compatible or genuine cartridges
- Avoid letting cartridges run completely dry
- Keep printer firmware updated
- Perform regular printhead cleaning
- Store cartridges properly if unused
Routine maintenance extends the lifespan of your printer.
Conclusion
Replacing an HP printer ink cartridge is a simple process when done correctly. By following the step-by-step instructions above, you can ensure proper installation, maintain high print quality, and prevent common printer errors. Additionally, keeping your HP printer software updated, managing your account login, and using available support services will help you maintain optimal performance over time.
Leave a Reply