

Configuring a static IP address for your HP printer ensures a stable network connection and prevents issues caused by changing IP addresses. When a printer is set to dynamic (DHCP), the router may assign a new IP address after a restart, which can lead to printing or scanning errors. Setting a static IP keeps your printer consistently accessible across your network.
What Is a Static IP Address on an HP Printer?
A static IP address is a fixed network address assigned to your printer. Unlike DHCP (Dynamic Host Configuration Protocol), which automatically assigns IP addresses, a static IP remains the same unless manually changed.
Setting a static IP address is useful for:
- Office environments with multiple users
- Network printing and scanning setups
- Remote access configuration
- Preventing “Printer Offline” errors
Most HP printers support static IP configuration through the printer control panel or the Embedded Web Server (EWS).
Methods to Configure HP Printer Static IP Address
You can configure a static IP using:
- Printer Control Panel
- Embedded Web Server (EWS)
- Router Configuration
Method 1: Configure Static IP via Printer Control Panel
4
Follow these steps:
Step 1: Access Network Settings
- Turn on your HP printer.
- Go to Setup or Settings.
- Select Network Setup or Wireless Settings.
Step 2: View Current IP Address
- Select View Network Configuration or IPv4 Settings.
- Note the current IP address.
Step 3: Change to Manual (Static) IP
- Choose Advanced Settings.
- Select IP Settings.
- Change from Automatic (DHCP) to Manual or Static.
Step 4: Enter IP Details
You’ll need:
- IP Address (e.g., 192.168.1.200)
- Subnet Mask (usually 255.255.255.0)
- Default Gateway (your router IP, e.g., 192.168.1.1)
Confirm and save the settings. Restart the printer if required.
Method 2: Configure Static IP Using Embedded Web Server (EWS)
4
Step 1: Find Printer IP Address
Print a Network Configuration Page from the printer control panel.
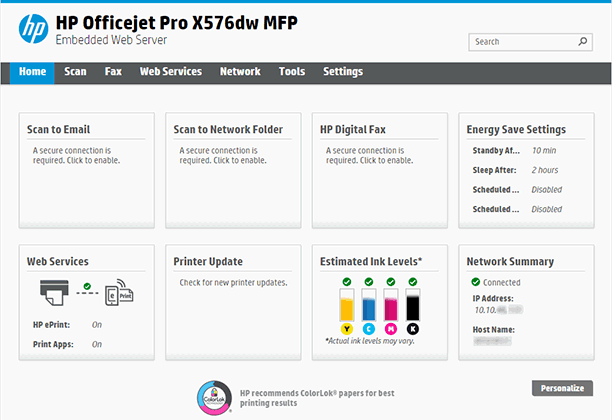
Step 2: Access EWS
- Open a web browser on your computer.
- Type the printer’s current IP address into the address bar.
- Press Enter to open the Embedded Web Server.
Step 3: Navigate to Network Settings
- Click Networking tab.
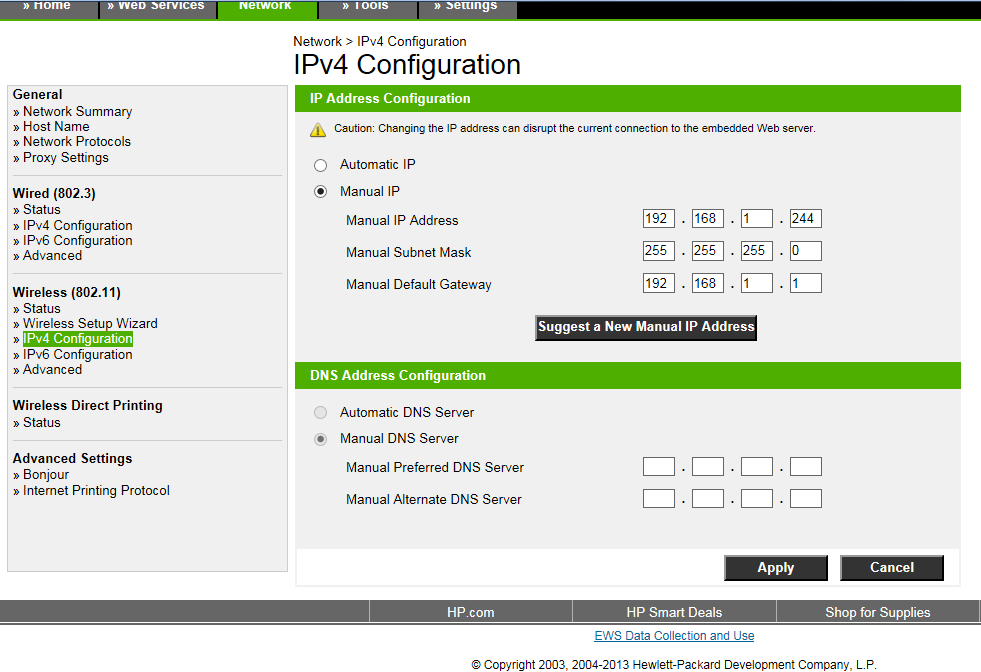
- Select IPv4 Configuration.
Step 4: Set Manual IP
- Choose Manual IP.
- Enter the required IP address details.
- Click Apply.
The printer will restart with the new static IP address.
Benefits of Setting a Static IP Address
Stable Network Connection
Prevents printing interruptions caused by IP address changes.
Easier Device Management
Makes it easier to configure scanning to email, shared folders, or server connections.
Improved Troubleshooting
Network issues become easier to diagnose when the printer IP does not change.
Better Office Workflow
Ideal for shared printers in business environments.
Troubleshooting HP Printer Static IP Configuration Issues
If your HP printer is not working after setting a static IP, try the following:
Check IP Conflict
Ensure the chosen IP address is not already assigned to another device on the network.
Verify Router Settings
Confirm that the IP address is within your router’s subnet range.
Restart Devices
Restart:
- Printer
- Router
- Computer
Reinstall Printer Driver
If the printer shows offline:
- Remove the printer from your computer.
- Re-add it using the new static IP address.
Reset Network Settings
If problems persist:
- Restore printer network settings to default.
- Reconfigure the static IP from scratch.
Updating Printer After Static IP Configuration
After setting a static IP:
- Update printer drivers from the official HP software installed on your computer.
- Ensure firmware is up to date.
- Reconfigure scanning and network-based features using the new IP address.
Outdated drivers can cause connectivity issues even if the IP is correctly configured.
When to Contact HP Printer Customer Support
Contact HP support if:
- You cannot access the Embedded Web Server
- The printer does not save manual IP settings
- Network errors persist after troubleshooting
- Firmware updates fail
Provide:
- Printer model number
- Current firmware version
- Router model
- Network setup type (wired or wireless)
Conclusion
Configuring a static IP address on your HP printer ensures reliable network connectivity and prevents common printing issues caused by changing IP addresses. Whether you use the printer control panel or the Embedded Web Server, the setup process is straightforward when proper network details are entered.
By setting a static IP address, you improve printer stability, simplify troubleshooting, and enhance overall performance in both home and office environments. Regular maintenance, updated drivers, and proper network configuration will help keep your HP printer running smoothly without interruptions.
Leave a Reply